Skip to content

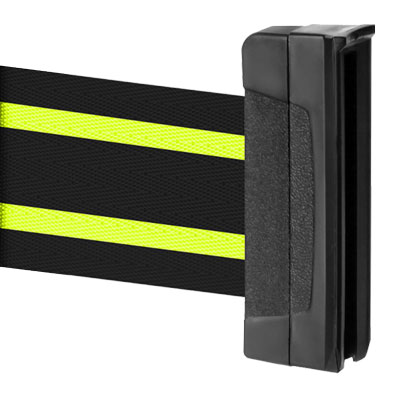
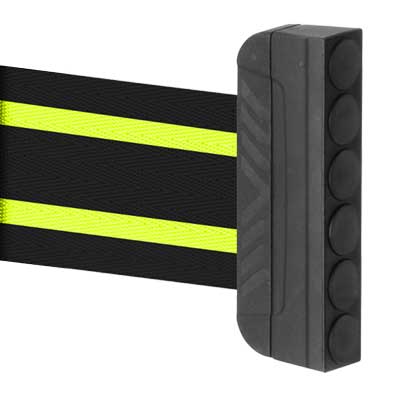
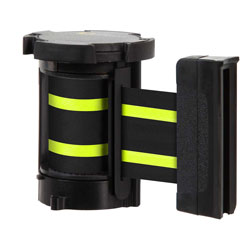
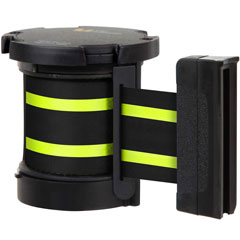
Lavi Beltrac Replacement PartsBUY - Order Lavi Industries Replacement Parts HereThis page contains everything you need to know about Lavi Industries' Beltrac replacement parts. Belt End Replacement Assembly InstructionsParts List: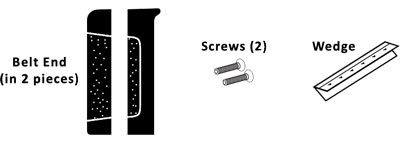
Required Tools:
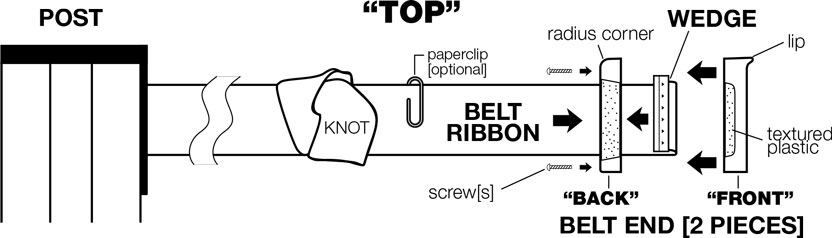
BEFORE YOU START: Examine your new plastic Belt End carefully. It will arrive disassembled in two pieces. Belt End "BACK": Has textured plastic that wraps around the back and a radius corner which should be oriented to "TOP". IMPORTANT: The top edge of the Belt Ribbon and the top of the Belt End must be oriented "top-to-top" throughout assembly or the newly assembled Belt End will not work properly. 1. Pull enough Belt Ribbon out from post to make a loose knot. This will keep it from irretrievably retracting and will make it easier to work with. Take note of the top edge of the Belt Ribbon [suggestion: paperclip]. Cut the old plastic Belt End off with scissors, taking care not to unravel the Belt Ribbon. 2. Thread the Belt Ribbon through the slot in the Belt End "BACK" from the side with the countersink holes. Double-check that the radius corner and the Belt Ribbon are oriented to "TOP". 3. Position Wedge in Crimping Tool: position the fold of the Wedge against the screws. Gently apply pressure with Crimping Tool to hold in place. Do not clamp. 4. Feed the Belt Ribbon into the Wedge. Make sure it is centered and fully seated to the back of the Wedge, then apply pressure with the Crimping Tool to securely clamp the Belt Ribbon into the Wedge. 5. Fold Ribbon/Wedge over and fit it snugly into the BACK piece of the plastic Belt End. Fit the FRONT piece of the plastic Belt End onto the BACK piece [there is only one way it will fit] and secure with screws. Untie knot and retract Belt. 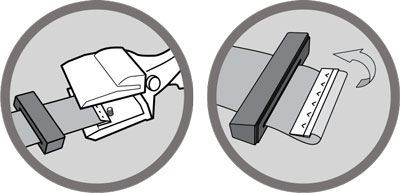
You can use any standard pliers or this special Belt End Crimper ToolBelt Mechanism Removal and InstallationDetermine what kind of mechanism you are replacing:Review the illustration below and determine if you have an "old" mechanism (prior to 2014) or a "new" mechanism (2014 or later). 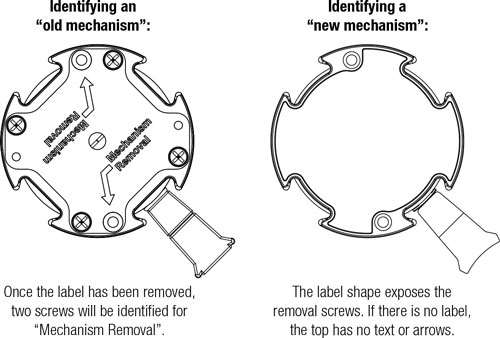
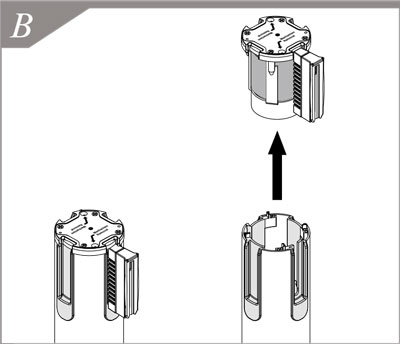
Removing an "old" mechanism:1. Remove the label. In older mechanisms, the label covers the screws that need to be removed in order to release the mechanism from the post. The label should peel off easily. 2. Remove the two Phillips head screws marked for "Mechanism Removal" noted by the arrows. Do not remove any of the other screws. Removal of the Spring/Belt screws could cause the tensioned spring to release, resulting in injury. (Figure A) 3. Lift Belt Mechanism straight up from the post. (Figure B) 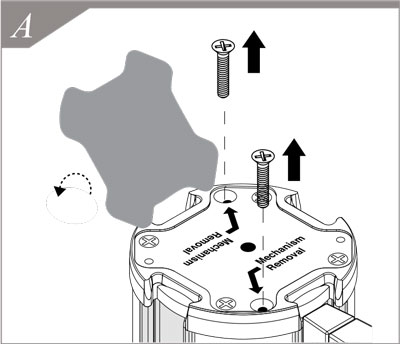
Removing a "new" mechanism:1. The label for new mechanisms does NOT cover the removal screws. They are clearly exposed so there is no need to remove the label. 2. Remove the two flat head screws. (Figure C) 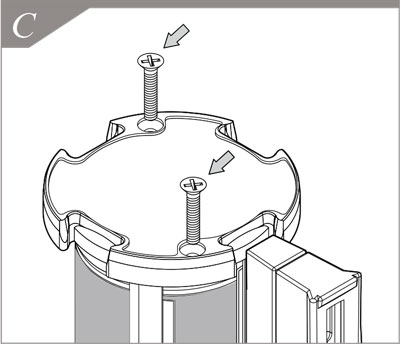
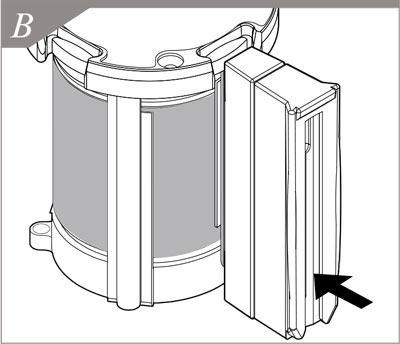
Mechanism Installation:1. Your new mechanism should arrive with the belt guide and belt end neatly tucked into proper position. If it has come loose, click the belt guide back into place. See Figure A to determine where the belt guide slots into the mechanism casing. Once they are clicked together, there is no need to pull the belt out, it is ready to slide into the post. (Figure B) 2. Align mechanism to post so the beltguide is lined up to the notch in post. 
3. Drop in place, apply a small amount of pressure if needed. (Figure C) 4. Secure mechanism to post with (2) 6-32 x 3/4" pan head screws (provided) via the two exposed countersink holes in the cap. (Figure D) When properly secured, the screw heads will sit slightly below the cap surface. 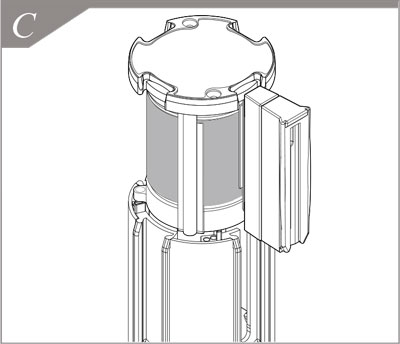

How to select a correct size accessory for Lavi Beltrac Stanchions 7’ or 13’ feet beltMost other major stanchion brands have the same diameter tube for 7’ and 13’ feet retractable belt barriers. Lavi Beltrac 3000 tube size is different. Before ordering a part, measure the belt length or use this method below to determine the size. You have to know this if you are ordering: Lavi Beltrac 30007 feet belt post diameter is 2 ¾ inches (6.98 cm)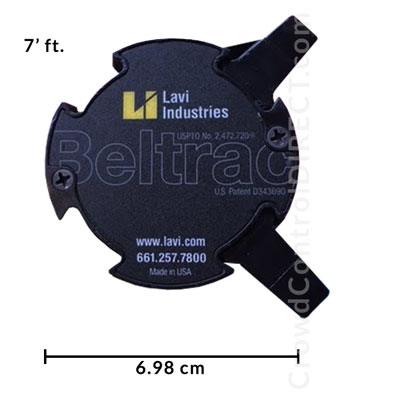 13 feet belt post diameter is 3 ¼ inches (8.25 cm)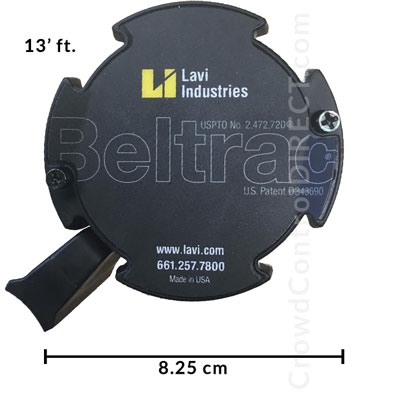 This is how the belt stanchion top measure with any credit card: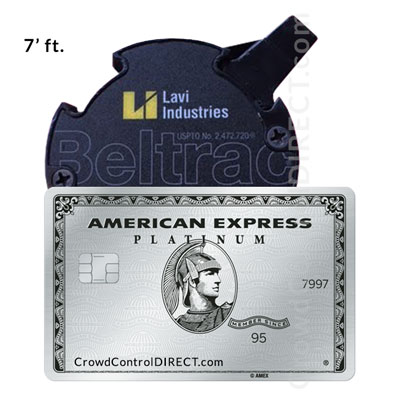 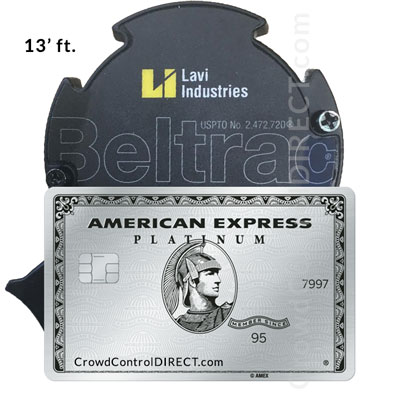 Old Design 7' ft.  Old Design 12' ft.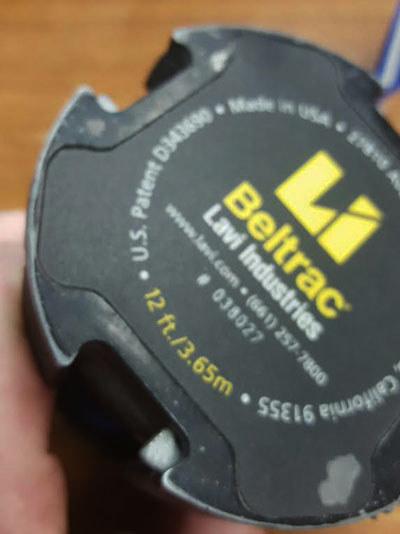 |